Tumble dryer - How to replace the bearing assembly
Oplossing

Refer always to your product’s user manual safety information before any repair or maintenance operation. https://www.electrolux.com/support/user-manuals/

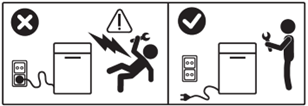
WARNING! RISK OF ELECTRIC SHOCK
Before any repair or maintenance operation, deactivate the appliance and disconnect the mains plug from the socket.
WARNING! RISK OF INJURY

Always take care when moving appliances. For heavy appliances it's safest for two persons to move it. Always use safety gloves and safety footwear. Wear safety gloves at all times to protect from cuts from sharp edges.
WARNING! RISK OF EYE INJURY

Wear safety glasses if you perform maintenance or repair work involving springs.
WARNING! RISK OF PINCHING

Wear safety glovesif you perform maintenance or repair work involving belts.

WARNING! CHOKING HAZARD
Small parts not for children under 3 years. Keep all small parts and packaging out of reach of children.
Only adults should use or install the product.
Always empty the appliance of all the water, e.g. tumble dryer water container. Any maintenance should be carried out with the appliance standing upright. Residual water could damage electronics if the appliance is placed on any of its sides.
Make sure to use the product only for its designated purpose and verify that it is a compatible part for the intended product.
Do not use or install the product if damaged.
Please note that self-repair or nonprofessional repair can have safety consequences if not done properly and might void the warranty. Possessing the necessary know-how is essential.
How to replace the bearing assembly
1. Unscrew the PH2 screw for the bearing cover and remove the bearing cover.

2. Remove the retaining clip for the bearing shaft.
Note: To refit you may need to use pliers to squeeze it back onto the shaft.

3. To remove the left side panel, pull the panel up and away from the body of the machine to release the panels from the securing tabs at the bottom and on the side.

4. Unscrew the two PH2 screws for the bearing assembly.

5. Use a small flat blade screwdriver to prise of the old bearing assembly.

6. When assembling, repeat steps in reverse order.
Note: When the bearing housing is removed the drum will drop, using some help lift the inside of the drum to line up the drum shaft correctly when reassembling.

Was dit artikel nuttig?
Gerelateerde artikelen
- Droogkast - Hoe de bussenrol te vervangen
- Hoe een deurslot vervangen
- Droogkast - Hoe de aandrijfriem vervangen (6)
- Droogkast - Hoe de klemrol vervangen
- Droogkast - Hoe het verwarmingselement vervangen (3)
- Droogkast - motor vervangen
- Droogkast - Hoe de aandrijfriem vervangen (2)
- Hoe het bedieningspaneel (5) te vervangen
- Hoe het bedieningspaneel (2) te vervangen
- Droogkast - Hoe de spanveer vervangen